

Planning a party gets a lot easier when you know what to do and when to do it. A clear timeline keeps your budget in check and your setup calm instead of frantic.
It helps you focus on the big picture while handling details like food, décor, and supplies at the right time.
You’ll get the best results if you plan party tasks and buy tableware in stages, starting weeks ahead and wrapping up before the big day. This method saves you from last-minute shopping and wasted money.
It also makes cleanup a breeze—well, as much as it can be.
This guide walks you through shaping your vision, locking in key tasks, and planning tableware purchases alongside food, drinks, and décor.
You’ll move through each step with purpose and build a party that feels organized, welcoming, and honestly, a lot easier to host.
Setting the Foundation: Vision, Guest List, and Budget
Set the direction of your party early. Choices about theme, guests, and money shape everything else.
These decisions also guide your party checklist and help you dodge last-minute changes.
Define Your Party Theme and Vision
Start by deciding what kind of event you want. The theme sets the mood, style, and how formal things get. It also affects your food, tableware, music, and where you host.
Keep your vision simple and specific. A clear plan saves time and keeps extra costs down.

Focus on these details:
● Purpose of the event (birthday, holiday, dinner, or just a hangout)
● Time of day and how long the party will run
● Indoor or outdoor venue
● Style: casual, semi-formal, or formal
Write your vision in one short sentence. Use it as a filter for every decision you make.
Establishing Your Guest List
Build your guest list early because it controls almost every other choice. The number of guests affects your venue, food, seating, and tableware.
Start with a rough list, then confirm who fits your space and budget.
Guest list tips:
● Match guest count to venue capacity
● Think about plus-ones before sending invites
● Separate “must invite” and “nice to invite” groups
● Plan for a few declines
A clear guest list helps you estimate food and supplies with less waste. It keeps your planning checklist realistic and manageable.
Setting and Allocating the Budget
Set a total budget before spending anything. This step keeps you on track and avoids stress later.
Break the budget into clear categories. Adjust amounts based on what matters most to you.
| Category | Typical Share |
|---|---|
| Food | ~40% |
| Drinks | ~20% |
| Tableware & decor | ~15% |
| Buffer | ~25% |
Add tableware to your budget early. Plates, cups, and napkins often get overlooked, but they’re key.
Timeline for Essential Party Tasks
A clear party planning timeline helps you figure out what to do first and what can wait. This task-by-task approach keeps things realistic and avoids last-minute chaos.
Six to Eight Weeks Before: Initial Planning
Start with the basics. Choose the party type, date, and location.
Set a firm budget and note your top priorities, like food quality or seating.
Create a guest list early. The headcount affects your space, menu, and tableware needs.
Book key services now. This might mean a venue, caterer, or rentals.
Add deadlines to your checklist to track deposits and confirmations.
Begin a rough shopping list. Include big tableware items like plates and serving trays so you know what to grab later.
Four to Six Weeks Before: Invites and Menu
Send invitations during this window. Include the date, time, location, and RSVP deadline.
Digital invites are great, but printed invitations need extra time for design and delivery.
Track responses as they come in. Update your checklist weekly so your guest count stays current.
Plan the menu with care. Choose dishes that fit your skill level and schedule.
Review your tableware plan. Decide if you need disposable or reusable items, and add exact quantities to your shopping list based on early RSVP numbers.
Two to Four Weeks Before: Shopping and Details
Lock in the guest count once most RSVPs are in. This lets you finalize food orders and rentals.
Confirm all vendors. Double-check delivery times, setup needs, and contact info.
Shop for non-perishables now—drinks, paper goods, candles, decorations. Buying early gives you better selection and fewer rushed trips.
Update your shopping list with food and tableware counts. Keep one master list so you don’t buy doubles or forget something important.
One Week to Day Of: Final Preparations
Shift your focus to execution. Finish all grocery shopping for fresh food and prep what you can ahead.
Set up your space in stages. Arrange tables and serving areas first, then lay out tableware a day ahead if you can.
Use a short, daily checklist during this final stretch. Many hosts stick to a simple checklist at this point.
On party day, follow your timeline. Put out tableware, chill drinks, and prep food in order. This helps you stay calm and on schedule.
Tableware Plan: What to Buy and When
You need a clear tableware plan to avoid shortages and last-minute stress. Guest count, menu style, and cleanup goals guide what you buy or rent.
Determining Tableware Needs by Guest Count
Start with your final guest count, then build a simple shopping list. For seated meals, plan one main plate, one salad plate, and one dessert plate per guest.
Add one extra set for every 8–10 guests, just in case. For drinks, plan two to three cups per guest if you serve more than one beverage.
Buffet or appetizer parties need smaller plates, about 1.5 plates per guest, since people come back for more.
Serving dishes matter too. Plan one serving dish per menu item, plus two extras for backups. Add shared items like tongs, ladles, and serving spoons early so nothing gets missed.
When to Purchase or Rent Tableware
Buy or rent large items early. Four to six weeks before, secure rentals for tables, chairs, linens, and specialty tableware. Rental stock fills up fast during holidays and weekends.
Purchase disposable tableware and basic party supplies two to four weeks before the event.
This timing lets you adjust quantities after RSVPs. Store items together so you can review your table settings at a glance.
Do a final check one week before. Count plates, cups, utensils, and napkins. Replace missing items and confirm delivery dates.
Avoid shopping in the final two days unless you need food or ice. No one wants to run out last minute.
Eco-Friendly and Disposable Options
Eco-friendly tableware works for most parties and makes cleanup easier. Look for compostable plates made from bamboo or sugarcane.
These handle hot and cold food without leaking. Use this quick guide when choosing options:
| Item | Recommended Amount |
|---|---|
| Plates | 2–3 per guest |
| Napkins | 4–5 per guest |
| Cups | 2–3 per guest |
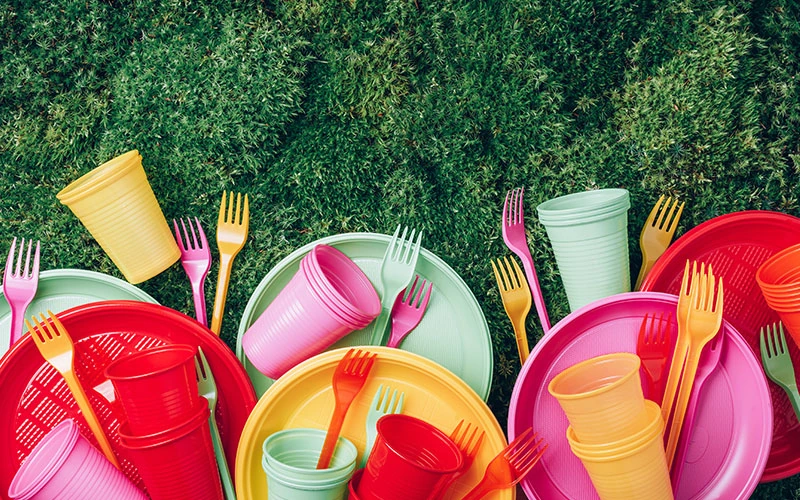
Pick neutral colors so your table settings fit any theme. Check local composting rules before the event. If composting isn’t available, pick sturdy disposables so you don’t have to double up on plates.
Decorations and Party Atmosphere Essentials
You set the vibe the moment guests walk in with smart decor choices and good timing. Focus on a simple theme, buy in stages, and set up lighting and centerpieces that support the mood without clutter.
Selecting Party Decor and Theme Elements
Start with one clear theme and a tight color set. Pick two main colors and one accent to guide everything from balloons to table linens.
This keeps your space consistent and easy to manage. Choose decor that fits your event size and location.
For small gatherings, wall banners, table runners, and centerpieces usually work better than huge installations. For bigger parties, add balloons, a backdrop, or a simple photo booth.
Use this checklist to stay focused:
● Balloons: arches, clusters, or floor weights
● Table decor: centerpieces, place cards, runners
● Walls: banners, signs, or framed prints
● Photo booth: backdrop, props, stand or tripod
Avoid theme overload. Repeating a few key elements looks cleaner and costs less.
Timing and Shopping for Decorations
Buy decorations in phases to avoid last-minute panic. Large or custom items need the most lead time.
Small fillers can wait until closer to the event. Suggested timeline:
| Timeframe | What to Buy |
|---|---|
| 4–6 weeks out | Backdrops, banners, custom signs |
| 2–3 weeks out | Balloons, table decor, photo booth props |
| 3–5 days out | Fresh items, last-minute accents |
Store decor by area, not by type. Keep table items together and wall items in another box. Label everything so you don’t lose track. Check sizes before you buy. Measure tables, doorways, and wall space so things fit as planned.
Setting Up Ambience: Lighting and Centerpieces
Lighting sets the tone faster than any other decor. Use string lights for soft, even light across walls or ceilings.
Place battery candles on tables for warmth without cords or heat. Centerpieces should stay low or narrow so guests can see each other without moving stuff around.
Good options include:
● Small floral arrangements
● Candles with simple holders
● Stacked books or trays with accents
Set up lighting first, then place centerpieces. This helps you spot dark areas and balance the room. Test all lights the night before. Replace weak batteries and keep extras nearby just in case.
Menu Planning, Food, and Drinks Preparation
Plan your menu with clear portions and simple timing. Choose food that holds well and dishes you can prep ahead to cut down on stress when the party rolls around.
Building a Balanced Menu
Start your menu with three anchors: appetizers, a main offering, and drinks. Pick party food that actually fits your guest count, space, and serving style.
Here’s a simple balance to keep things easy:
● Appetizers: 4–6 pieces per person per hour
● Main food: about 1 pound per person for a full meal
● Desserts: 1–2 small portions per guest
Mix hot and cold options. Always include at least one vegetarian choice and something dairy-free or gluten-free. Finger foods are usually best for standing parties. They cut down on tableware and make mingling easier.
If you’re working with a caterer, double-check portion sizes and delivery times early. Ask what arrives ready to serve and what needs reheating—nobody likes scrambling last minute.
Timing Purchases for Food and Beverages
Buy food in stages so you don’t waste money or end up with sad, wilted produce. Start with items that keep well, then move to fresh stuff closer to the event.
2–4 weeks before
● Shelf-stable drinks, wine, spirits
● Frozen appetizers and make-ahead dishes
● Pantry items, spices, and oils
1 week before
● Meat, seafood, and specialty items
● Non-alcoholic drinks and mixers
1–2 days before
● Produce, bread, herbs, ice
Plan for 2 beverages per person per hour. Split the options between alcoholic and non-alcoholic. Water is a must, whether you do bottles or pitchers.
Make-Ahead Dishes and Appetizers
Make-ahead dishes are a lifesaver. Try to prep 70% of your menu before party day, if you can swing it.
Some good choices:
● Dips, spreads, and chilled soups
● Marinated proteins
● Baked finger foods that reheat well
● Desserts that freeze or chill
Store everything in labeled containers. Jot reheating instructions right on the lid with tape.
Set out appetizers in small batches and refill as needed. That keeps food fresh and cuts down on waste.
Entertainment, Activities, and Favors
Strong entertainment and clear activities keep guests engaged. Well-timed favors at the end leave everyone smiling. Plan each part early so it fits your space, schedule, and tableware setup.
Booking Entertainment and Live Music
Book entertainment as soon as you lock in your date and budget. Popular acts like live music, DJs, or performers book up fast—especially during holidays or summer.
Match your entertainment to the guest list and space. Live music works for outdoor or bigger rooms, but a playlist and speakers are perfect for something smaller.
Ask performers about setup needs, power access, and break times. It’s worth getting those details sorted early.
Here’s a quick timing guide:
| When | What to Do |
|---|---|
| 6–4 weeks before | Book entertainment and sign contracts |
| 3 weeks before | Confirm setup needs and arrival time |
| 1 week before | Share the event timeline and final details |
Try to schedule sound checks before guests arrive. Nobody wants to hear feedback during cocktails.
Organizing Party Games and Activities
Pick party games and activities that actually fit your crowd’s age and energy. Simple games keep things moving and avoid long, awkward pauses.
Plan activities that use minimal supplies and don’t hog table space. Card games, trivia, or quick group challenges work well near dining areas. If you’ve got kids attending, set up a separate table with crafts or games just for them.
Set up a clear flow so games don’t interrupt food service. Stash supplies in labeled bins and bring them out right before they’re needed. Focus on a handful of activities and do them well. Too many choices just confuse people and slow things down.
Choosing and Timing Party Favors
Pick party favors that your guests can actually use or eat. Things like candles, snacks, or even small plants usually work for most themes and don’t end up as clutter.
Try to buy favors early, if you can, so you have time to match them with your tableware or decorations. Just stash them somewhere cool and dry until the big day rolls around.
Here’s a super simple timing plan:
3–2 weeks before: Buy or order party favors.
1 week before: Assemble and label favors.
Day of the party: Set them out at each place setting or by the exit.
Hand out the favors at the end of the party. That way, people won’t lose track of them while they’re mingling or dancing.